This weekend didn’t yield as much snow as predicted, but it is COLD and we still have ice and a dusting of snow. In other words, it’s perfect comfort food weather. Chicken and dumplings had to happen. I learned to make this classic southern favorite the old fashioned, but very easy, way. I learned from my Gran and my mama and neither ever used a recipe. The way we prepare this is how we prepare many of our dishes – it’s mostly a method. From experience, we just know how much flour to add, when the consistency is correct, etc. It’s a learned way of doing things that I think is common of many prepared dishes that get handed down through generations. No direct recipe, just a tried and true way of doing things. What I’ll share is basically a tutorial, but I hope its helpful for those who want to make some homemade chicken and dumplings at home.
Old Fashioned Chicken & Dumplings
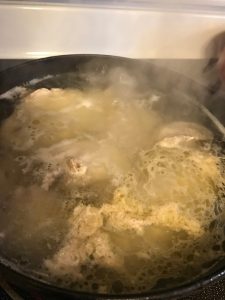
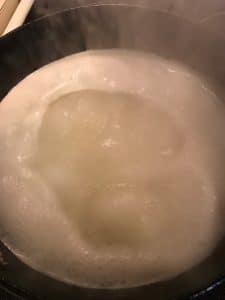
The first thing you do is cook your chicken. For this batch, I used my cast iron Dutch oven. I used bone-in/skin-on chicken breasts and a package of boneless/skinless chicken thighs. You can use whatever chicken you like, but I do recommend some skin on because cooking the skin will help your dumplings come together well. Just boil your chicken in water seasoned with 1.5 teaspoons of salt. Cook it until the chicken is done.

While the chicken is cooking, prepare your dumpling flour. Use 4c self rising flour (I highly recommend White Lily, it’s the brand our family has used for many years) and 1 tablespoon black pepper. Blend those together with a whisk. (I like black pepper in my dumplings – you can adjust to taste.)
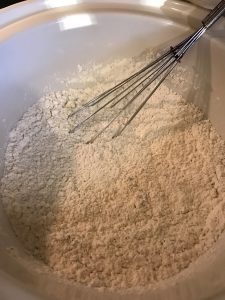
Make a “well” (as my Gran would say) in the center of your flour mixture once it’s mixed together.
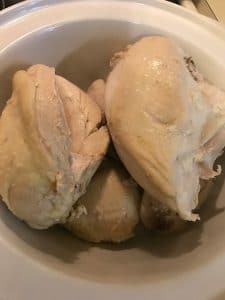
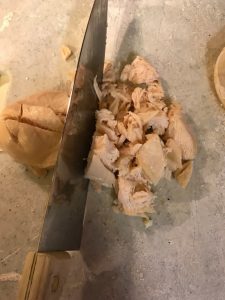
Once the chicken is done, remove it from the water and set aside for now.
To the water that is left in the cooking pot, add 3T butter and bring to a rolling boil.
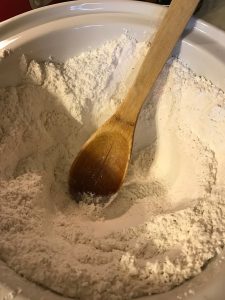
Now, it’s time to make the dumplings. Start by pouring the boiling hot water from the pot into the “well” created in the flour mixture This is where you have to “eye ball it” and judge when your dough consistency is right. I’ll give the measurements I used for reference. To your 4 cups of flour and 1T of black pepper, add 3.5 cups boiling hot water from the pot and begin to mix together to form your dumpling dough. (At this point, turn down your remaining cooking liquid to medium.)
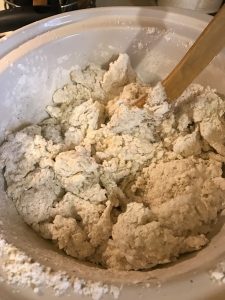
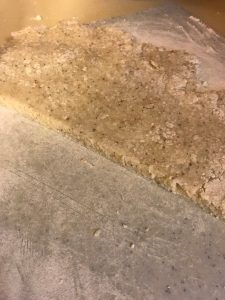
Dumpling dough should not be wet and sticky. It should be a consistency that can be kneaded and rolled (see photo above for reference) .You will probably also have some dough left in the bottom of the bowl and that is okay. Just make sure you can work your dough with your hands. Too much water will make your dumplings mushy and they’ll just fall apart on you.
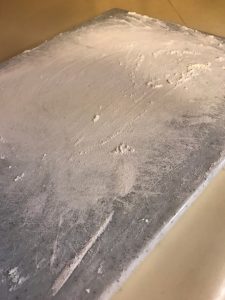
Flour a working surface. I just use a cutting board that I coat well with flour.
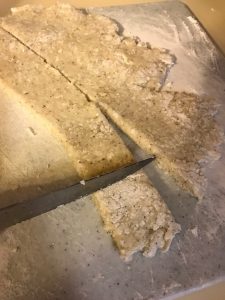
In small batches, grab up some dough to knead and work into a ball on your floured surface. (My mom’s note: be sure to knead your dough well so that your dumplings hold together in the cooking liquid.) Roll out the dough with a rolling pin or even a floured glass – whatever is easiest.
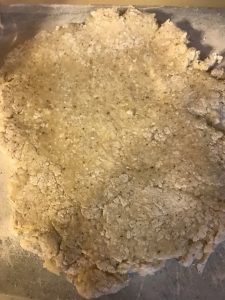
It doesn’t have to be pretty, trust me, it’ll still be good. Cut your dough into strips and then into dumplings.
Add each dumpling to the remaining water in the pot. (That is now on medium on the stove.)
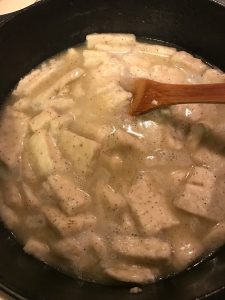
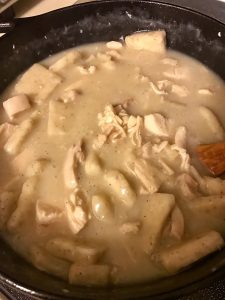
When all the dough is cut into dumplings and they are all cooking, then cut up the chicken and add it to the pot.
You may need more cooking liquid at this point. If you do, simply add some chicken broth or stock. Just keep an eye on the liquid level as it cooks. They key is not letting it get either too dry or too soupy. This is one of those times where I don’t have a measurement, just advice to “eyeball it.” I also tend to add more black pepper here. Optional, of course.
Simmer on low for at least half an hour and stir regularly. Since the chicken is done, you’re just getting your dumplings cooked through at this point. I tend to cover mine and cook on low for awhile. Again, I’ve never timed it, but a half hour should be good once you’ve gotten all the ingredients added to the pot. You can taste test a dumpling to check, as well.
**************
So, there it is…my old fashioned, tried and true, method of making chicken and dumplings. As I was writing this post, my mama happened to call. She reminded me that she learned this method from her paternal grandmother. This way of making chicken and dumplings goes way back in our family, so it has to be good, right? Trust me…it is! This is a filling and comforting dish. I often take this to family or friends who are sick or need a pick me up. And, now I can finally share the “recipe” by way of this blog. If you have any questions or comments, please post. I hope this is very explanatory, but I always appreciate feedback too.
Pass the black pepper…
Kel
*************
Sharing just the recipe/method, without photos, in case anyone wants to copy/paste for easy printing…
Old Fashioned Chicken & Dumplings
- Chicken of your choice – I use bone-in/skin-on chicken breasts (sometimes I will also add chicken thighs as well, but prefer chicken breasts)
- Water to cook chicken seasoned with 1.5 teaspoons salt
- 4 cups self-rising flour (I recommend White Lily)
- 1 tablespoon black pepper, or to taste
- 3 tablespoons butter
- 3.5 cups boiling water from cooking chicken
- Chicken broth, optional
Boil chicken in a large pot – I used a cast iron Dutch oven for this particular batch. Cover with water seasoned with 1.5 teaspoons of salt and boil until done.
While the chicken is cooking, prepare your dumpling flour. Use 4c self rising flour and 1 tablespoon black pepper. Blend those together with a whisk. (I like black pepper in my dumplings – you can adjust to taste.)Make a “well” in the center of your flour mixture once it’s mixed together to prepare to make dumplings once the chicken is done.
Once the chicken is done, remove it from the water and set aside. To the water that is left in the cooking pot, add 3T butter and bring to a rolling boil.
To make dumplings: pour boiling hot water from the pot into the “well” created in the flour mixture. This is where you have to “eye ball it” and judge when your dough consistency is right. I’ll give the measurements I used for reference. To your 4 cups of flour and 1T of black pepper, add 3.5 cups boiling hot water and begin to mix. (At this point, turn down your remaining cooking liquid to medium.) Dumpling dough should not be wet and sticky. It should be a consistency that can be kneaded and rolled.You will probably also have some dough left in the bottom of the bowl and that is okay. Just make sure you can work your dough with your hands. Too much water will make your dumplings fall apart.
Flour a working surface. I just use a cutting board that I coat well with flour.
In small batches, grab up some dough to knead and work into a ball on your floured surface. (My mom’s note: knead your dough well so that your dumplings hold together in the cooking liquid.) Roll out the dough with a rolling pin or even a floured glass – whatever is easiest.
It doesn’t have to be pretty, trust me, it’ll still be good. Cut your dough into strips and then into dumplings. Add each dumpling to the remaining water in the pot. (That is now on medium on the stove.) When all the dough is cut into dumplings and they are all cooking, then cut up the chicken and add it to the pot.
You may need more cooking liquid at this point. If you do, simply add some chicken broth or stock. Just keep an eye on the liquid level as it cooks. They key is not letting it get either too dry or too soupy. This is one of those times where I don’t have a measurement, just advice to “eyeball it.” I also tend to add more black pepper here. Optional, of course. Simmer on low for at least half an hour and stir regularly. Since the chicken is done, you’re just getting your dumplings cooked through at this point. I tend to cover mine and cook on low for awhile. Again, I’ve never timed it, but a half hour should be good once you’ve gotten all the ingredients added to the pot. You can taste test a dumpling to check, as well.
Old Fashioned Chicken & Dumplings
Ingredients
- Approx 1-1.5 pounds Chicken of your choice ( I use bone-in/skin-on chicken breast and use a package that has about 3-4 nice size pieces in it. I sometimes will use chicken thighs in addition to chicken breasts, just depends on what I find at the store.)
- Water to cook chicken seasoned with 1.5 teaspoons salt (Salt level is according to taste)
- 4 cups Self-rising flour (I recommend White Lily brand.)
- 1 Tbsp Black pepper (More/less to taste)
- 3 Tbsp Butter
- 3.5 cups BOILING water (from cooking the chicken)
- Chicken broth (optional)
Instructions
- Boil chicken in a large pot – I used a cast iron Dutch oven for this particular batch. Cover with water seasoned with 1.5 teaspoons of salt and boil until done.
- While the chicken is cooking, prepare your dumpling flour. Use 4c self rising flour and 1 tablespoon black pepper. Blend those together with a whisk. (I like black pepper in my dumplings – you can adjust to taste.)
- Make a “well” in the center of your flour mixture once it’s mixed together to prepare to make dumplings once the chicken is done.
- Once the chicken is done, remove it from the water and set aside. To the water that is left in the cooking pot, add 3T butter and bring to a rolling boil.
- To make dumplings: pour boiling hot water from the pot into the “well” created in the flour mixture. This is where you have to “eye ball it” and judge when your dough consistency is right. I’ll give the measurements I used for reference. To your 4 cups of flour and 1T of black pepper, add 3.5 cups boiling hot water and begin to mix. (At this point, turn down your remaining cooking liquid to medium.) Dumpling dough should not be wet and sticky. It should be a consistency that can be kneaded and rolled.You will probably also have some dough left in the bottom of the bowl and that is okay. Just make sure you can work your dough with your hands. Too much water will make your dumplings fall apart.
- Flour a working surface. I just use a cutting board that I coat well with flour.
- In small batches, grab up some dough to knead and work into a ball on your floured surface. (My mom’s note: knead your dough well so that your dumplings hold together in the cooking liquid.) Roll out the dough with a rolling pin or even a floured glass – whatever is easiest.
- Cut your dough into strips and then into dumplings. Add each dumpling to the remaining water in the pot. (That is now on medium on the stove.) When all the dough is cut into dumplings and they are all cooking, then cut up the chicken and add it to the pot.
- You may need more cooking liquid at this point. If you do, simply add some chicken broth or stock. Just keep an eye on the liquid level as it cooks. They key is not letting it get either too dry or too soupy. This is one of those times where I don’t have a measurement, just advice to “eyeball it.” I also tend to add more black pepper here. Optional, of course.
- Simmer on low for at least half an hour and stir regularly. Since the chicken is done, you’re just getting your dumplings cooked through at this point. I tend to cover mine and cook on low for awhile. Again, I’ve never timed it, but a half hour should be good once you’ve gotten all the ingredients added to the pot. You can taste test a dumpling to check, as well.