• Skip to main content
  • Skip to primary sidebar

Coffee with Kel

Building relationships, encouraging hope

Recipes

Low Carb Sugar Free Lemon Pound Cake

April 6, 2020 By kelly 2 Comments

Hi, all!!

Today I want to share a recipe for a delicious low carb, sugar free lemon pound cake that I have recently discovered and REALLY like a lot! Since we are trying to cut back on our carbs and sugar intake, this is a PERFECT way to have a dessert without all the guilt. While we do not strictly adhere to a Keto diet, this is also Keto-friendly. As I said when I posted my sour cream pound cake recipe last year, I am a BIG fan of pound cake, so this is a winner for me right now in that it’s delicious, easy and guilt free.

Shout out to Mickey for installing a recipe plug-in for me. You can now print the recipe below – HOORAY!!

As I am able to, I’ll go edit my recent posts to make them more printer friendly as well. And for his efforts, Mickey has earned some lemon pound cake. I think that’s a fair trade, don’t y’all?   

Be sure to click through to read more… [Read more…] about Low Carb Sugar Free Lemon Pound Cake

Filed Under: Recipes 2 Comments

Double Chocolate Biscotti

April 3, 2020 By kelly Leave a Comment

Hello, everyone and HAPPY FRIDAY! I realize it might not be a Friday when you read this blog post, so…happy whatever day it is, in that case.

I’m sure I’ve mentioned previously and it’s probably obvious, but I enjoy baking. This quarantine has given me more opportunities to get into the kitchen to prepare meals AND to bake, so I see those as silver linings for sure. Recently I’ve learned to make biscotti and I’m sharing the recipe with you all today. Macey loves to have biscotti with her coffee, so rather than continuing to try to buy it, we have been making it. No shade on “store bought”, but you really can’t beat homemade for quality and taste.

Be sure to click through to read more…

[Read more…] about Double Chocolate Biscotti

Filed Under: Recipes Leave a Comment

Smaller Size Sour Cream Pound Cake

March 31, 2020 By kelly Leave a Comment

Two blog posts in two days. WHAAAAAAAAAT?! I feel pretty sure I’m not going to become an every day blogger, but, hey…never say never.

Today I want to share a recipe for one of our family favorites – sour cream pound cake.  I would venture to say that most southerners enjoy pound cake. I can absolutely vouch that THIS southern girl ADORES a good pound cake. The top part is my absolute fave! I confess that even though I will be resisting this one, it’ll take ALL my willpower. Pound cake is absolutely delicious by itself, but can also be enjoyed in a fruit trifle, as the base for strawberry shortcake, and more.  So, it’s not only great tasting, but versatile too. What’s not to love?

This is a recipe I’ve made for YEARS that I have typically made in a loaf pan. However, I just recently got a super cute new 6-cup bundt pan and I wanted to try it and it worked beautifully for this recipe. I’ll give y’all the approximate cooking times for a loaf pan AND a 6-cup bundt because they both work well. This is the PERFECT recipe for when you want some pound cake, but you don’t need a whole HUGE one.  Since Mickey and I are back on our Intermittent Fasting/Low Carb/Low Sugar plan, this one is for our sweet girls to have this week.

Be sure to click through to read more…

[Read more…] about Smaller Size Sour Cream Pound Cake

Filed Under: Recipes Leave a Comment

Oreo Truffles for Your Valentine

January 30, 2017 By kelly 6 Comments

Our sweet Macey is home sick with strep today. She hasn’t had it in at least three years, maybe four, but it got her this time and the poor girl is MISERABLE. So, prayers are requested and much appreciated for her to have quick healing.

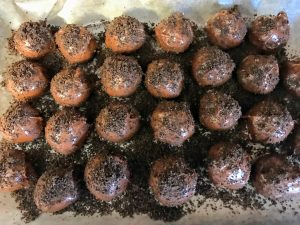
I’ve been wanting to share some homemade Valentine ideas and today is a great day to share Oreo Truffles because they are, hands down, one of Macey’s very favorite things on earth EVER. And, I can honestly agree with her that they are amazing! Chocolate is a traditional Valentine’s gift, so what could be better than some delicious homemade Oreo Truffles?

Oreo Truffles

  • 1 package Oreos (regular, not double stuff)
  • 1 (8oz) block cream cheese (regular or reduced fat)
  • 16oz semi sweet chocolate chips

Oreos, cream cheese, and semi sweet chocolate chips are your three ingredients. That’s all you need. Shown is a 12oz package of chocolate chips, but I found that I needed about a quarter bag more.

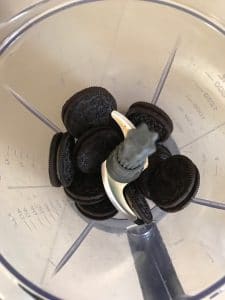
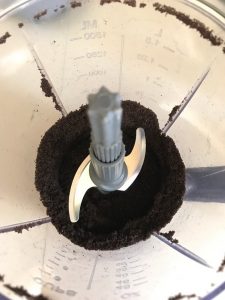
In a blender or food processor, crush an entire bag of Oreo cookies. I used my Ninja, so I did this in several batches.

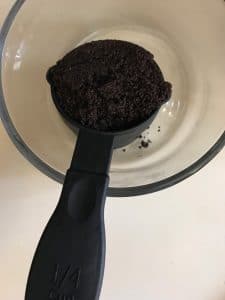
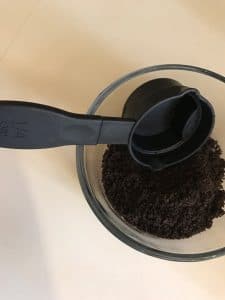
Reserve 1/4 cup of the crumbs for sprinkling on the truffles.

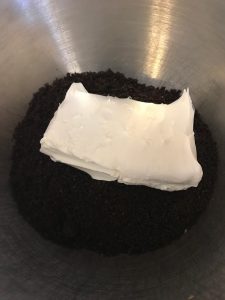
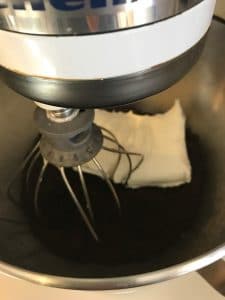
Add the rest of the crumbs with an 8oz block of cream cheese into a mixing bowl. (Or, if you’re using a food processor, just add the cream cheese to the Oreo crumbs.) I used my stand mixer for this.

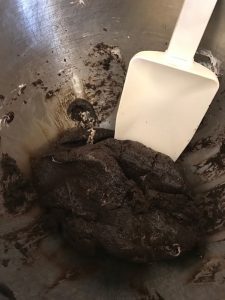
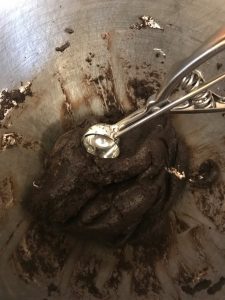
Mix your Oreo crumbs and cream cheese together. Place in freezer for 15 minutes.

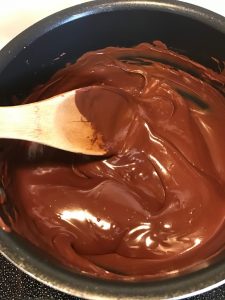
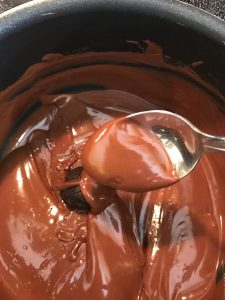
Melt your semi sweet chocolate chips on the stove top.

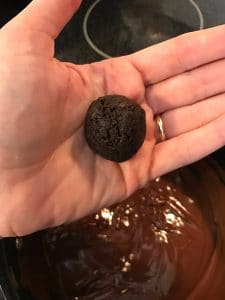
Once your truffle mixture has had time in the freezer, scoop into balls and dip into the melted chocolate

I use a spoon to roll the truffle balls around in the melted chocolate and to lift them out.

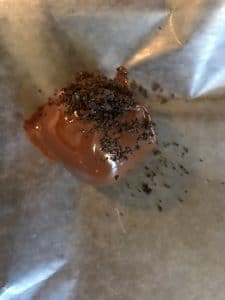
Once they are dipped, place them onto a baking sheet that’s been lined with wax paper.

When each truffle comes out, I sprinkle with the reserved Oreo crumbs. When they are all done, I sprinkle again. Why not?

I put the whole baking sheet into the fridge and let the truffles set for about an hour. Once they are nicely set, I move them to an airtight container and store in the fridge.

I wish I had a photo of these all packaged up prettily, but that wasn’t the case for this batch. They went into a reusable container and into our fridge several weeks ago. And, they didn’t last long. These are a HIT! You can package these in a Valentine themed package and surprise your sweetie with something easy and completely yum too!

Enjoy!
Kelly

************

Oreo Truffles

  • 1 package Oreos (regular, not double stuff)
  • 1 (8oz) block cream cheese (regular or reduced fat)
  • 16oz semi sweet chocolate chips

(Oreos, cream cheese, and semi sweet chocolate chips are your three ingredients. That’s all you need. Shown is a 12oz package of chocolate chips, but I found that I needed about a quarter bag more.)

  1. In a blender or food processor, crush an entire bag of Oreo cookies. I used my Ninja, so I did this in several batches.
  2. Reserve 1/4 cup of the crumbs for sprinkling on the truffles.
  3. Add the rest of the crumbs with an 8oz block of cream cheese into a mixing bowl. (Or, if you’re using a food processor, just add the cream cheese to the Oreo crumbs.)
  4. Mix your Oreo crumbs and cream cheese together. Place in freezer for 15 minutes.
  5. Melt your semi sweet chocolate chips on the stove top.
  6. Once your truffle mixture has had time in the freezer, scoop into balls and dip into the melted chocolate.
  7. I use a spoon to roll the truffle balls around in the melted chocolate and to lift them out.
  8. Once the truffles are dipped, place them onto a baking sheet that’s been lined with wax paper.
  9. When each truffle comes out, I sprinkle with the reserved Oreo crumbs. When they are all done, I sprinkle again.
  10. I put the whole baking sheet into the fridge and let the truffles set for about an hour. Once they are nicely set, I move them to an airtight container and store in the fridge.
  11. ENJOY!

Filed Under: Recipes 6 Comments

Old Fashioned Chicken & Dumplings

January 8, 2017 By kelly 11 Comments

This weekend didn’t yield as much snow as predicted, but it is COLD and we still have ice and a dusting of snow. In other words, it’s perfect comfort food weather. Chicken and dumplings had to happen. I learned to make this classic southern favorite the old fashioned, but very easy, way. I learned from my Gran and my mama and neither ever used a recipe. The way we prepare this is how we prepare many of our dishes – it’s mostly a method. From experience, we just know how much flour to add, when the consistency is correct, etc. It’s a learned way of doing things that I think is common of many prepared dishes that get handed down through generations. No direct recipe, just a tried and true way of doing things. What I’ll share is basically a tutorial, but I hope its helpful for those who want to make some homemade chicken and dumplings at home.

Old Fashioned Chicken & Dumplings

Jump to Recipe
Print Recipe

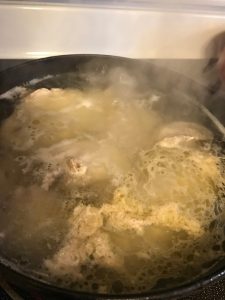
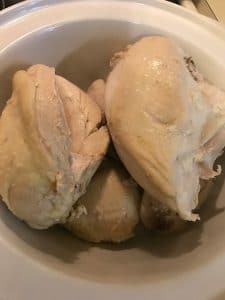
The first thing you do is cook your chicken. For this batch, I used my cast iron Dutch oven. I used bone-in/skin-on chicken breasts and a package of boneless/skinless chicken thighs. You can use whatever chicken you like, but I do recommend some skin on because cooking the skin will help your dumplings come together well. Just boil your chicken in water seasoned with 1.5 teaspoons of salt. Cook it until the chicken is done.

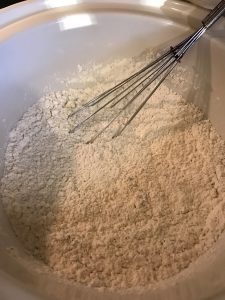
While the chicken is cooking, prepare your dumpling flour. Use 4c self rising flour (I highly recommend White Lily, it’s the brand our family has used for many years) and 1 tablespoon black pepper. Blend those together with a whisk. (I like black pepper in my dumplings – you can adjust to taste.)

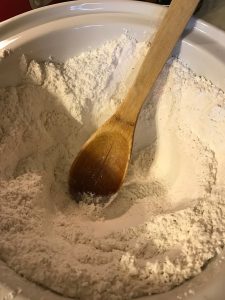
Make a “well” (as my Gran would say) in the center of your flour mixture once it’s mixed together.

Once the chicken is done, remove it from the water and set aside for now.

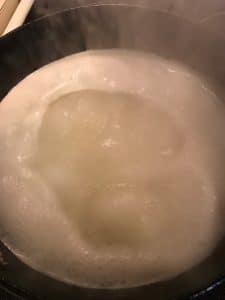
To the water that is left in the cooking pot, add 3T butter and bring to a rolling boil.

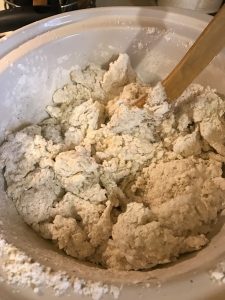
Now, it’s time to make the dumplings. Start by pouring the boiling hot water from the pot into the “well” created in the flour mixture This is where you have to “eye ball it” and judge when your dough consistency is right. I’ll give the measurements I used for reference. To your 4 cups of flour and 1T of black pepper, add 3.5 cups boiling hot water from the pot and begin to mix together to form your dumpling dough. (At this point, turn down your remaining cooking liquid to medium.)

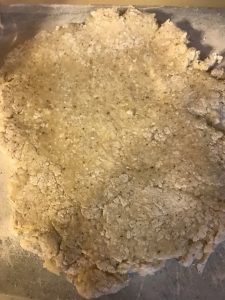
Dumpling dough should not be wet and sticky. It should be a consistency that can be kneaded and rolled (see photo above for reference) .You will probably also have some dough left in the bottom of the bowl and that is okay. Just make sure you can work your dough with your hands. Too much water will make your dumplings mushy and they’ll just fall apart on you.

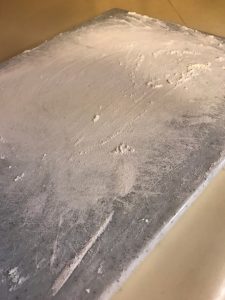
Flour a working surface. I just use a cutting board that I coat well with flour.

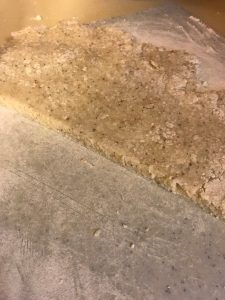
In small batches, grab up some dough to knead and work into a ball on your floured surface. (My mom’s note: be sure to knead your dough well so that your dumplings hold together in the cooking liquid.) Roll out the dough with a rolling pin or even a floured glass – whatever is easiest.

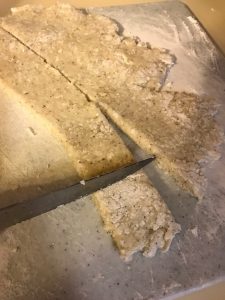
It doesn’t have to be pretty, trust me, it’ll still be good. Cut your dough into strips and then into dumplings.

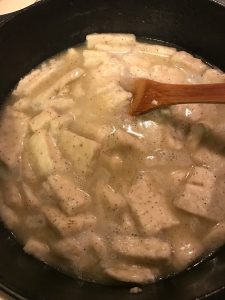
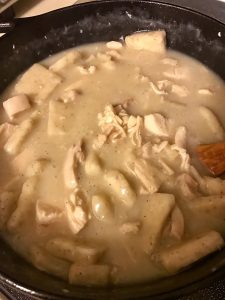
Add each dumpling to the remaining water in the pot. (That is now on medium on the stove.)

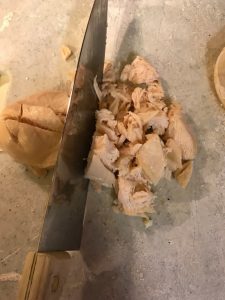
When all the dough is cut into dumplings and they are all cooking, then cut up the chicken and add it to the pot.

You may need more cooking liquid at this point. If you do, simply add some chicken broth or stock. Just keep an eye on the liquid level as it cooks. They key is not letting it get either too dry or too soupy. This is one of those times where I don’t have a measurement, just advice to “eyeball it.” I also tend to add more black pepper here.  Optional, of course.

Simmer on low for at least half an hour and stir regularly. Since the chicken is done, you’re just  getting your dumplings cooked through at this point. I tend to cover mine and cook on low for awhile. Again, I’ve never timed it, but a half hour should be good once you’ve gotten all the ingredients added to the pot. You can taste test a dumpling to check, as well.

**************

So, there it is…my old fashioned, tried and true, method of making chicken and dumplings. As I was writing this post, my mama happened to call. She reminded me that she learned this method from her paternal grandmother. This way of making chicken and dumplings goes way back in our family, so it has to be good, right? Trust me…it is! This is a filling and comforting dish. I often take this to family or friends who are sick or need a pick me up. And, now I can finally share the “recipe” by way of this blog. If you have any questions or comments, please post. I hope this is very explanatory, but I always appreciate feedback too.

Pass the black pepper…
Kel

*************

Sharing just the recipe/method, without photos, in case anyone wants to copy/paste for easy printing…

Old Fashioned Chicken & Dumplings

  • Chicken of your choice – I use bone-in/skin-on chicken breasts (sometimes I will also add chicken thighs as well, but prefer chicken breasts)
  • Water to cook chicken seasoned with 1.5 teaspoons salt
  • 4 cups self-rising flour (I recommend White Lily)
  • 1 tablespoon black pepper, or to taste
  • 3 tablespoons butter
  • 3.5 cups boiling water from cooking chicken
  • Chicken broth, optional

Boil chicken in a large pot – I used a cast iron Dutch oven for this particular batch. Cover with water seasoned with 1.5 teaspoons of salt and boil until done.

While the chicken is cooking, prepare your dumpling flour. Use 4c self rising flour and 1 tablespoon black pepper. Blend those together with a whisk. (I like black pepper in my dumplings – you can adjust to taste.)Make a “well” in the center of your flour mixture once it’s mixed together to prepare to make dumplings once the chicken is done.

Once the chicken is done, remove it from the water and set aside. To the water that is left in the cooking pot, add 3T butter and bring to a rolling boil.

To make dumplings: pour boiling hot water from the pot into the “well” created in the flour mixture. This is where you have to “eye ball it” and judge when your dough consistency is right. I’ll give the measurements I used for reference. To your 4 cups of flour and 1T of black pepper, add 3.5 cups boiling hot water and begin to mix. (At this point, turn down your remaining cooking liquid to medium.) Dumpling dough should not be wet and sticky. It should be a consistency that can be kneaded and rolled.You will probably also have some dough left in the bottom of the bowl and that is okay. Just make sure you can work your dough with your hands. Too much water will make your dumplings fall apart.

Flour a working surface. I just use a cutting board that I coat well with flour.

In small batches, grab up some dough to knead and work into a ball on your floured surface. (My mom’s note: knead your dough well so that your dumplings hold together in the cooking liquid.) Roll out the dough with a rolling pin or even a floured glass – whatever is easiest.

It doesn’t have to be pretty, trust me, it’ll still be good. Cut your dough into strips and then into dumplings. Add each dumpling to the remaining water in the pot. (That is now on medium on the stove.) When all the dough is cut into dumplings and they are all cooking, then cut up the chicken and add it to the pot.

You may need more cooking liquid at this point. If you do, simply add some chicken broth or stock. Just keep an eye on the liquid level as it cooks. They key is not letting it get either too dry or too soupy. This is one of those times where I don’t have a measurement, just advice to “eyeball it.” I also tend to add more black pepper here.  Optional, of course. Simmer on low for at least half an hour and stir regularly. Since the chicken is done, you’re just  getting your dumplings cooked through at this point. I tend to cover mine and cook on low for awhile. Again, I’ve never timed it, but a half hour should be good once you’ve gotten all the ingredients added to the pot. You can taste test a dumpling to check, as well.

Old Fashioned Chicken & Dumplings

Coffee with Kel
This is a recipe for good, old fashioned chicken and dumplings made the simplest way possible. My advice is to use it as a guide and learn your technique more than just a recipe - that's the way I was taught.
Print Recipe
Course Main Course

Ingredients
  

  • Approx 1-1.5 pounds Chicken of your choice ( I use bone-in/skin-on chicken breast and use a package that has about 3-4 nice size pieces in it. I sometimes will use chicken thighs in addition to chicken breasts, just depends on what I find at the store.)
  • Water to cook chicken seasoned with 1.5 teaspoons salt (Salt level is according to taste)
  • 4 cups Self-rising flour (I recommend White Lily brand.)
  • 1 Tbsp Black pepper (More/less to taste)
  • 3 Tbsp Butter
  • 3.5 cups BOILING water (from cooking the chicken)
  • Chicken broth (optional)

Instructions
 

  • Boil chicken in a large pot – I used a cast iron Dutch oven for this particular batch. Cover with water seasoned with 1.5 teaspoons of salt and boil until done.
  • While the chicken is cooking, prepare your dumpling flour. Use 4c self rising flour and 1 tablespoon black pepper. Blend those together with a whisk. (I like black pepper in my dumplings – you can adjust to taste.)
  • Make a “well” in the center of your flour mixture once it’s mixed together to prepare to make dumplings once the chicken is done.
  • Once the chicken is done, remove it from the water and set aside. To the water that is left in the cooking pot, add 3T butter and bring to a rolling boil.
  • To make dumplings: pour boiling hot water from the pot into the “well” created in the flour mixture. This is where you have to “eye ball it” and judge when your dough consistency is right. I’ll give the measurements I used for reference. To your 4 cups of flour and 1T of black pepper, add 3.5 cups boiling hot water and begin to mix. (At this point, turn down your remaining cooking liquid to medium.) Dumpling dough should not be wet and sticky. It should be a consistency that can be kneaded and rolled.You will probably also have some dough left in the bottom of the bowl and that is okay. Just make sure you can work your dough with your hands. Too much water will make your dumplings fall apart.
  • Flour a working surface. I just use a cutting board that I coat well with flour.
  • In small batches, grab up some dough to knead and work into a ball on your floured surface. (My mom’s note: knead your dough well so that your dumplings hold together in the cooking liquid.) Roll out the dough with a rolling pin or even a floured glass – whatever is easiest.
  • Cut your dough into strips and then into dumplings. Add each dumpling to the remaining water in the pot. (That is now on medium on the stove.) When all the dough is cut into dumplings and they are all cooking, then cut up the chicken and add it to the pot.
  • You may need more cooking liquid at this point. If you do, simply add some chicken broth or stock. Just keep an eye on the liquid level as it cooks. They key is not letting it get either too dry or too soupy. This is one of those times where I don’t have a measurement, just advice to “eyeball it.” I also tend to add more black pepper here.  Optional, of course. 
  • Simmer on low for at least half an hour and stir regularly. Since the chicken is done, you’re just  getting your dumplings cooked through at this point. I tend to cover mine and cook on low for awhile. Again, I’ve never timed it, but a half hour should be good once you’ve gotten all the ingredients added to the pot. You can taste test a dumpling to check, as well.

Notes

Please note that this is more of a "method" than a recipe the way I make it, so you may find that you need to finesse measurements some to your liking. This is a very easy, simple way to make chicken and dumplings the old fashioned way and has room for flexibility according to taste. I also recommend checking out the blog post and seeing the photos for reference. 
https://www.coffeewithkel.com/201701/old-fashioned-chicken-dumplings/

Filed Under: Recipes 11 Comments

  • Go to page 1
  • Go to page 2
  • Go to page 3
  • Interim pages omitted …
  • Go to page 7
  • Go to Next Page »

Primary Sidebar

About me

Subscribe to Blog via Email

Enter your email address to subscribe to this blog and receive notifications of new posts by email.

Recent Posts

  • What’s a 2 To Do? Part Five…
  • What’s a 2 To Do? Part Four…
  • What’s a 2 To Do? Part Three…
  • What’s a 2 To Do? Part Two…
  • What’s a 2 To Do?

Blogs

  • Kelly’s Korner
  • Mickey's Blog
  • Proverbs 31 Ministries
  • Think Inclusive

Copyright © 2023